- Overview
- Creating The Blog
- GitLab CI Automatic Build/Testing
- GitLab CI Automatic FTP Deployment
- Conclusion
Overview
Recently I decide to try and blog more of my projects for a personal record and to maybe be helpful to others too. So I looked into blogging tools available starting with the ubiquitous WordPress platform but I quickly became annoyed with its bloat and how annoying it is to customize and maintain. I looked at others but the majority required Node.js or other technologies that most shared hosting providers do not offer.
These issues led me to Jekyll which while it requires Ruby to create and update the blog, it generates a static website using standard web tech that will run on anything. However unlike WordPress you don’t get a quick and easy UI to create and manage your blog its all controlled through config files and Markdown posts. I much prefer this personally as it allows me to easily change anything I want without having to create custom plugins or make a custom theme. I can just pick a theme and easily modify its HTML/CSS templates to my liking, even if the theme developer didn’t provide a option to change a specific element.
Since I was trying to make the blogging process quick and simple for myself, I needed a way to auto build and deploy the blog to the web server whenever I added a new post. The solution I used was GitLab Continuous Integration pipeline which would trigger a build and upload each time I pushed a commit to master.
In the following sections I will explain these stages in detail.
Full Disclaimer: I am not an expert in Jekyll or GitLab CI, all the following was figured out with lots of trial & error and plenty of incomplete or outdated tutorials.
Feel free to leave any feedback as I would love to learn better solutions or fix any mistakes before they inevitably give me a headache.
Creating The Blog
The first step was to get Jekyll and Ruby installed. Jekyll already have a pretty good guide for this so I won’t repeat it here: Install Guide
Since I was new to Jekyll I didn’t want to start from scratch I found this theme that seemed like a good base with a dark theme
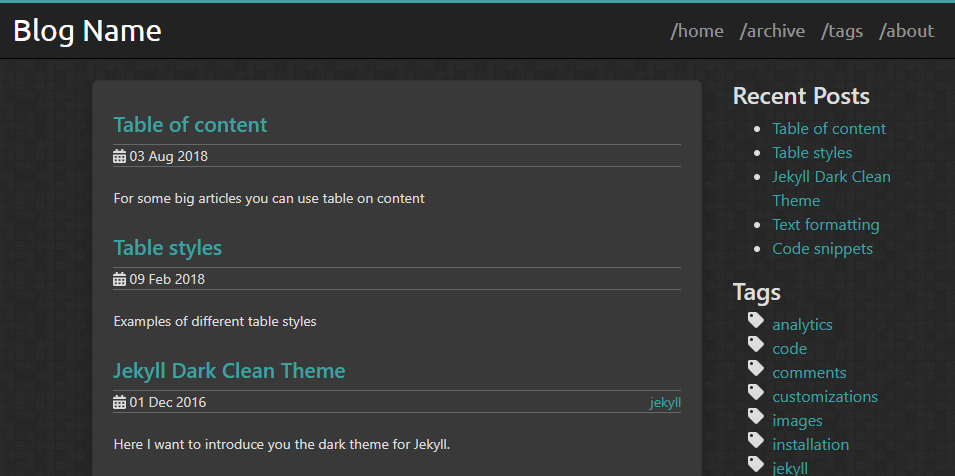 Themes Default Look
First I cloned the repo and edited the _config.yml and theme.scss to do some basic customizations for the blog, which are explained in the default posts it has in the theme.
I removed the default posts and boilerplate content and started to test the blog on multiple platforms, unfortunately their are a few issues mostly related to out of date dependencies I’ll provide links to what helped me fix these below:
There maybe others that I’ve forgotten about, if you encounter any other issues leave a comment and I’ll try my best to help.
At this point I’d created an initial blog post and finished my customizations so decided to deploy it to my website. The manual way to do this involves running the jekyll build command and then uploading the _site folder with a FTP tool. This might be fine for some but I’d much prefer this automated, and as a bonus I can add testing to make sure the compiled site is validated as good HTML with no broken links, much faster than manually checking every link.
GitLab CI Automatic Build/Testing
While I could have set up a local build system I decided to use GitLab’s Continuous Integration system on my private GitLab Community Edition instance hosted in a Unraid Docker container. (Tutorial on how to set up GitLab CE on Unraid coming soon)
This setup might still work on public GitLab but will probably need altering.
Make sure Gemfile is added to your Git repo.
One extra file needed for this pipeline to work is a Ruby Gemfile that contains the Jekyll dependency for the blog. To create this file simply run the following commands on your dev machine:
bundle init
bundle add jekyll
Copied below is the first part of my gitlab-ci.yml file that configures the pipeline for GitLab CI. Don’t worry if it looks a bit overwhelming I will try and explain each step in detail later on.
# Part 1 - Setup
image: ruby:2.7

stages:
  - build
  - test

variables:
  JEKYLL_ENV: production
  LC_ALL: C.UTF-8

# Part 2 - Build
build:
  stage: build
  before_script:
    - bundle config set path '.vendor'
    - bundle install
  script:
    - bundle exec jekyll build -d public
  artifacts:
    paths:
      - public
  cache:
    paths:
      - .vendor/
  only:
    - master

# Part 3 - Testing
test:
  image: 18fgsa/html-proofer:gitlab-ci
  stage: test
  script:
    - htmlproofer --empty-alt-ignore --assume-extension --check-html --http-status-ignore 999 ./public
  only:
    - master
As I said its quite a lot to process seeing all at once so I will break it down starting with the setup at the beginning of the file.
If you want more information on GitLab CI yaml syntax: Reference Docs
Part 1 - Setup
image: ruby:2.7

stages:
  - build
  - test

variables:
  JEKYLL_ENV: production
  LC_ALL: C.UTF-8
First of all we set the default docker image our stages will use, I use a generic Ruby container but you could find one with jekyll pre-installed. Change the ruby version to what ever you are using on your development machine for better compatibility.
We then define the individual stages our pipeline has and set some environment variables that GitLab recommends for Jekyll projects
Part 2 - Build
build:
  stage: build
  before_script:
    - bundle config set path '.vendor'
    - bundle install
  script:
    - bundle exec jekyll build -d public
  artifacts:
    paths:
      - public
  cache:
    paths:
      - .vendor/
  only:
    - master
The build stage should look somewhat familiar to the standard build command but it also has to install Jekyll to the docker container.
Most of the extra instructions here are to setup caching the Jekyll install process, so on subsequent builds it will just use the cached version rather than re-downloading/installing. This can cut the build time from about 2 mins on first run to a few seconds on subsequent, so long as you setup persistent caching. (I will have a tutorial on how I setup MinIO as a cache server on Unraid coming soon)
So to break it down the first two lines are defining this block as the build stage. This is followed by the actual commands it will run, you can treat before_script and script as the same thing I just use before_script for setup commands. We use the bundle prefix as it will use the version of Jekyll we specified in the Gemfile earlier.
before_script & script Stages:
-
bundle config set path '.vendor'sets a path for it to install Jekyll (and its dependencies) into a local directory that we can cache. -
bundle installinstalls the dependencies we specified in the Gemfile. -
bundle exec jekyll build -d publicbuilds the blog into a folder named public. (I prefer to use a name different than the default ‘_site’) We prefix this command withbundle execas this guarantees we use the version of Jekyll we installed in the previous command.
Artifacts is what GitLab calls the finished build assets, we just pass the directory name to it and it will make that available in subsequent stages and also to download the build from the repo.
The next part tells GitLab to cache the contents of the .vendor directory we specified earlier.
To finish we specify that this stage only runs when a commit is made to the master branch only, this is a personal preference and depends on your Git workflow.
Part 3 - Testing
test:
  image: 18fgsa/html-proofer:gitlab-ci
  stage: test
  script:
    - htmlproofer --empty-alt-ignore --assume-extension --check-html --http-status-ignore 999 ./public
  only:
    - master
The testing stage of the code is fairly simple and I could probably expand it with more tests in the future, but currently it uses the HTMLProofer test suite.
For the test stage we change the Docker image used to a pre-compiled version of HTMLProofer optimized for GitLab CI, which make the script step a lot simpler.
As for the actual command I’m only going to explain the options I’ve selected, as you will likely need to look through all the possible options to configure them to your preferences. Here’s the list of all commands
-
--empty-alt-ignoreprevents a error when an img tag is missing an alt attribute. I can’t actually remember why I added this, I assume it was to do with how image markdown is converted to the HTML. Your millage may vary. -
--assume-extensionis important for Jekyll, as Jekyll doesn’t always add the .html to extension to its paths. This option will just assume it is a html file and run its tests anyway. -
--check-htmlenables the tests on html files. You probably want this on if you actually want any tests beyond basic checks. -
--http-status-ignore 999One of the features HTMLProofer provides is checking all links on the site resolve to a valid webpage, unfortunately some 3rd party sites return the 999 HTTP code to the tester which will cause the test to fail. More info on this issue -
./publicthe path to the site directory as defined in the build stage.
As with all the stages in a GitLab CI pipeline, if one stage fails the rest are never attempted, this means tests aren’t run on a site that failed to build. That scenario isn’t be a major concern, but you certainly don’t want a failed site to be deployed live, which our next stage will be doing.
GitLab CI Automatic FTP Deployment
Now in this step will we be auto deploying the site to a live web server using FTP. If you want to manually deploy or use another method you can still use the build and test stages then simply download the zipped up build of your site.
There are better ways to handle website deployment, but for my setup I needed to deploy to a standard shared hosting service who only allow FTP access.
#REMEMBER to add the deploy stage in the stage list at the beginning of the file-
stages:
  - build
  - test
  - deploy

#Previous stages would be here (Hidden for brevity)

deploy:
  image: minidocks/lftp
  stage: deploy
  script:
    - lftp -e "set ssl:verify-certificate/$FTP_FINGERPRINT off; open $FTP_URL; user $FTP_USERNAME $FTP_PASSWORD; mirror -X .* -X .*/ --reverse --delete --verbose public/ $FTP_PATH; bye"
  only:
    - master
I use another Docker image this time that has lftp pre-installed and this is all we need. Unfortunately the arguments for lftp are quite a mess to look at but I will try and break it down for you.
-
-e "executes the commands in the quotes, each command separated by semicolons. -
set ssl:verify-certificate/$FTP_FINGERPRINT off;this command is related to SSL and is a bit more complex, I will explain this in a later section -
open $FTP_URL;opens a connection to your server at the provided address. -
user $FTP_USERNAME $FTP_PASSWORD;sets your username and password for your FTP server. I’d suggest avoiding special characters as some seem to not get escaped properly. -
mirrormirrors a directory from a remote server to a local directory (Confused see –reverse)-
-X .* -X .*/The-Xcommand is used to exclude the specified files/directory. I’ve used it to exclude files with a period in front such as the.gitignorefile, and any directories with a dot in front. -
--reversereverses the transfer so data is mirrored from a local directory to a remote server -
--deleteremoves files on the FTP server directory that are not in the local directory. (If you delete a file from your git repo the FTP server will also remove it) -
--verboselogs more information to the pipeline logs in case of failure. -
public/The local directory you want to mirror, in our case the artifact directory we specified in the build stage. -
$FTP_PATH;The remote path you want to deploy to, make sure to use a full path.
Check this path is correct and the folder is empty as the--deletecommand will delete all files in this directory that aren’t in the Git Repo. (Maybe test first without the--deleteoption to play it safe)
-
-
bye"closes the connection to the remote server
You probably noticed several key parts of the command were replaced with variables like $FTP_URL. This is a handy feature of GitLab CI that lets you declare these variables in the settings so they are not publicly exposed in your .gitlab-ci.yml file. I’d suggest you use these even if your project is private, due to the ease of changing one of the variables without requiring a commit and pipeline run.
You can access this page at: Settings -> CI/CD -> Variables. Make sure to check your hosting provider’s documentation on how to connect to their FTP server.
I have also set the stage to only run on commits to the master brand as I have done in the other stages.
If you’d prefer to only have deploy run when you want, you can add the when: manual argument to the deploy stage. The deploy stage will then require you to trigger that stage on the pipeline page. More info on ‘when’ argument
One issue I couldn’t solve with lftp is how it always re-uploads the Jekyll generated html and css files, which I assume is caused by the last modified date being more recent. If anyone know a workaround for this I’d be very interested.
lftp SSL setup
If you tried to run the deploy stage without the following option set ssl:verify-certificate/$FTP_FINGERPRINT off; you will likely see an error about your SSL certificate not being verified. There are a few solutions to this issue depending on how worried you are about security.
If you don’t care about SSL security or your host doesn’t support it you can use set ftp:ssl-allow no; to disable it entirely. I strongly recommend against this as it can leave your username and password exposed along with all the files you transfer
Another option is to not verify the ssl certificate of the remote server set ssl:verify-certificate no, this preserves the secure connection but leaves you open to a man-in-the-middle attack. This type of attack requires a fair bit of work so is unlikely to be a big danger to the average user.
The best workaround i’ve found to provide some protection (But definitely not 100% protected!) set ssl:verify-certificate/$FTP_FINGERPRINT off. This will make lftp not verify certificates that match the passed in $FTP_FINGERPRINT of the FTP server’s SSL certificate. Easiest way to fetch this is to run the pipeline without this option included, this should cause the pipeline to fail and print an error similar to this in the console:
mirror: Fatal error: Certificate verification: subjectAltName does not match ‘
Your.Hostname.com’ (Your SSL Fingerprint e.g AB:CD:EF:12:etc...)
This is a soft verification of connecting to the correct server, the securer method would be to acquire the full SSL certificate from your FTP server and install it to the GitLab runner. Unfortunately it’s quite tricky to acquire the certificates when you don’t have full control of the FTP server and no solutions I’ve found work with my hosting provider.
More Info on acquiring SSL certificates
Conclusion
After all the above you should now have a GitLab CI pipeline that will automatically build, test and deploy a Jekyll website whenever you make a commit to the master branch. At this point feel free to add extra tests to the pipeline or implement a more robust deployment system to replace FTP uploading.
I must also give credit to this post which helped me a lot with my deploy stage. They also go into more detail on the lftp options than I do.